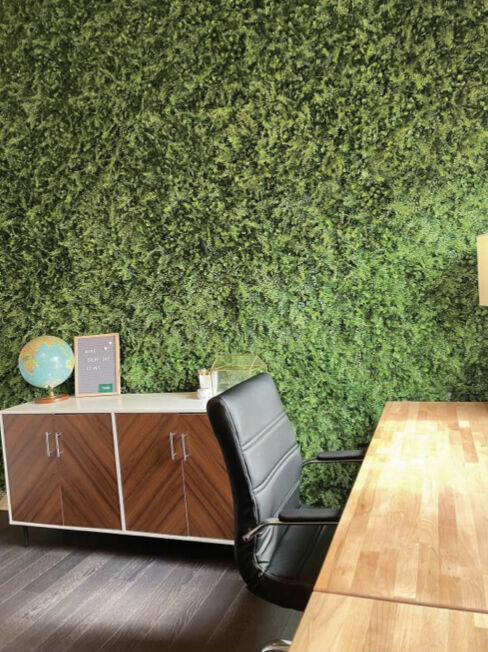
Interior design trends are embracing nature. Learn one way to bring the outdoors inside.
Published 8:00 am Tuesday, April 27, 2021

- IMG_3236.jpg
Green or floral walls have been on trend for weddings, showers and other events for a few years now. Perhaps gaining major popularity from the Kardashian-West nuptials with their gorgeous and (very expensive) white rose flower wall, the nature inspired deco can be seen all over Instagram.
The trend does not have to be used solely for weddings, however. Many people are incorporating this style in their homes, bringing a little of the outdoors inside. Offices, patios, nurseries, restaurants—everyone wants in on this flora frenzy for a picture-ready organic vibe.
Live green walls can be exorbitant in price and require much upkeep. Luckily, the faux greenery game these days is pretty convincing, so building an artificial wall can be a lot more affordable requiring little to no maintenance. Renting a portable and temporary green wall for an upcoming event is simple enough, but if you want to bring this eye-popping embellishment into your home or business for a more permanent design aesthetic, read on to learn how to make your own green partition. We spoke to Annelise Gerami, owner of Lovely Events + Planning and she chatted with us about how she made her own stunning home office green wall for a lifelike outdoorsy look.
The Creation
Creating your own permanent green wall is simple. You only need to gather a few tools and supplies, and after a few measurements start creating your new favorite art piece. Green thumb not required.
Choose your wall space. Typically, green walls are used for photo backdrops and if you plan to capture memories in front of your wall, choose a wall that is tall and wide enough. Six or seven feet tall and at least five feet wide should do the trick. If you are hanging a sign on the wall, be sure your space is big enough for this. An inside wall, fence, brick wall or patio are perfect spots for your new accessory. Record your measurements so you know how much grass paneling to order.
Gather your supplies. You will need a tape measure, scissors, grass panels and something to secure the panels. Supplies will vary depending on what type of wall you are beautifying. A staple gun works great for an inside wall. Command hooks or push pins can also be used. Concrete nails or brick hook clips work if your wall is made of brick. Most places sell endless options of grass panels, so the type of grass you chose is the vibe you are trying to achieve. Once you have measured your space, order as many panels that will cover your wall. The scissors will come in handy for cutting down panels to fit in the smaller spaces.
Covering your wall: Begin from the top of the wall and work your way down. Line up the grass panel even with the top of the wall and secure with staples or nails. Line the next panel up with the first one and secure. Continue this step until the wall is completely covered. You may need to cut the pieces along the way to fill smaller areas. You may also need to fluff out the grass or manipulate the leaves so that they look full and cover any bare wall space.
Caring for your green wall.
Not much maintenance and care are needed for a grass wall. Unlike a living wall, you won’t need to water it or make sure it has enough sunlight. Instead, a little extra dusting is all that is needed to keep your wall looking vibrant. As long as green walls are in style, this beautiful addition can last a lifetime.
And voila!
Now you have a nature-inspired piece of art in your home! If you try this in your own home or office space, send photos to shannap@acadianalifestyle.com


